ไฟฟ้าสถิต: การวัดค่า - การควบคุม - การตรวจสอบ (ESD: Measure – Control – Verify)
Posted 18 Nov 2024 10:50 | 7,945 views
The ideal ESD Control Plan is one that improves productivity, quality, and reliability, in addition to being flexible enough to accommodate changes and improvements in the manufacturing process. การวางแผนควบคุมไฟฟ้าสถิตเป็นวิธีหนึ่งที่ช่วยเพิ่มผลผลิต, ทำให้ชิ้นงานมีคุณภาพดียิ่งขึ้น และสามารถสร้างความน่าเชื่อถือให้แก่สินค้า แล้วยังทำให้กระบวนการผลิตดีขึ้น

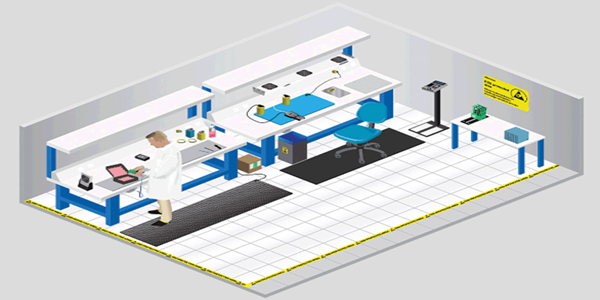
ESD Control Plans must evolve to keep pace with costs, device sensitivities, and the way devices are manufactured in the future. The management of an on-going ESD Control Plan can be broken down into 3 steps:
1. Measure
2. Control
3. Verify
Step 1. Measure the source the of ESD events.
Examples:
-
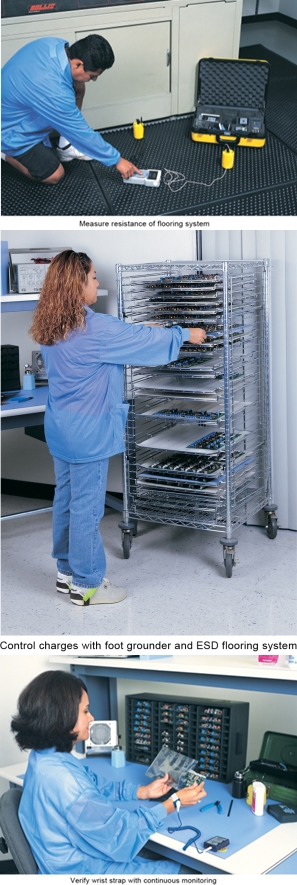
Measure the resistance of an operator to ground.
-
Measure the charge generation (walking test) of an operator.
-
Measure the static field on a housing of an assembled product
Step 2. Control ESD by implementing products to eliminate the source of ESD events.
Examples:
-
Control charges generated by an operator by implementing a personnel grounding (wrist strap or footwear/flooring) system.
-
Control charges generated by operators when walking in the ESD Protected Area by installing a footwear/flooring system.
-
Control charges on insulators and isolated conductors with ionization at the work area.
Step3. Verify that the ESD control measures implemented are functional and effective.
Examples:
-
Verify that operators are using their wrist strap correctly with continuous monitoring.
-
Verify that people entering the ESD Protected Area are wearing properly functioning ESD footwear with access control style wrist strap/footwear testers.
-
Verify the charge discharge times, offset voltage (balance), and coverage area of an ionizer with ionization test kit.
**Measurement ESD From DESCO :Click Here>> https://www.mostori.com/product_group_sub.php?gs=1
การวางแผนควบคุมไฟฟ้าสถิตช่วยทำให้เกิดการลดต้นทุน, ควบคุมอุปกรณ์ที่เปราะบาง, และรองรับชิ้นงานในอนาคต ฝ่ายบริหารควบคุมไฟฟ้าสถิตจะต้องระบุรายละเอียด 3 ขั้นตอน ดังนี้
1. การวัด
2. การควบคุม
3. การตรวจสอบ
ขั้นตอนที่ 1 การวัดแหล่งที่เกิดไฟฟ้าสถิต
ตัวอย่าง:
- การวัดค่าความต้านทานระหว่างพนักงานกับพื้นกราวด์
- การวัดค่าประจุไฟฟ้าที่ขณะพนักงานเคลื่อนที่
- การวัดไฟฟ้าสถิตของชิ้นงานขณะพนักงานปฏิบัติงาน
ขั้นตอนที่ 2 ควบคุมไฟฟ้าสถิตโดยการใช้ผลิตภัณฑ์ที่จะกำจัดแหล่งที่มาของเหตุการณ์ไฟฟ้าสถิต
ตัวอย่าง:
- ควบคุมการเกิดประจุไฟฟ้าระหว่างพนักงานกับพื้นกราวด์โดยใช้สายรัดข้อมือหรือรองเท้าป้องกันไฟฟ้าสถิต
- ควบคุมการเกิดประจุไฟฟ้าที่เกิดขึ้นขณะที่พนักงานเดินอยู่ในพื้นที่ที่ควบคุมไฟฟ้าสถิตโดยการสวมใส่รองเท้าหรือระบบพื้นป้องกันไฟฟ้าสถิต
- ควบคุมการเกิดประจุไฟฟ้าที่ฉนวนและตัวนำต่าง ๆโดยการใช้ ionization ในพื้นที่ที่ปฏิบัติงาน
ขั้นตอนที่ 3 ตรวจสอบมาตรการควบคุมไฟฟ้าสถิตให้มีการทำงานและมีประสิทธิภาพ
ตัวอย่าง:
- ตรวจสอบพนักงานว่ามีการใช้งานสายรัดข้อมือได้อย่างถูกต้องหรือไม่ และคอยตรวจสอบอย่างต่อเนื่อง
- ตรวจสอบบุคคลที่จะผ่านเข้าพื้นที่ที่ควบคุมไฟฟ้าสถิตว่ามีการสวมใส่อุปกรณ์ป้องไฟฟ้าสถิต โดยการติดตั้งเครื่องทดสอบสายรัดข้อมือและรองเท้าก่อนเข้าพื้นที่
- ตรวจสอบเวลาการสลายประจุไฟฟ้า, ความสม่ำเสมอ, และพื้นที่ที่ใช้ ionizer ควบคุม โดยการใช้อุปกรณ์ตรวจสอบ
Download

